在以前的工作中,一直没有弄清楚证书的作用及ca证,pem等等后缀文件的作用,本篇文章主要讲解
证书是如何生成的及ssl加密原理是什么样的?
SSL
SSL(Secure Sockets Layer 安全套接字协议),
及其继任者传输层安全(Transport Layer Security,TLS)
是为网络通信提供安全及数据完整性的一种安全协议。
TLS与SSL在传输层与应用层之间对网络连接进行加密。
在我们访问一个https的域名的时候,在这之间一共触发了多少个流程?
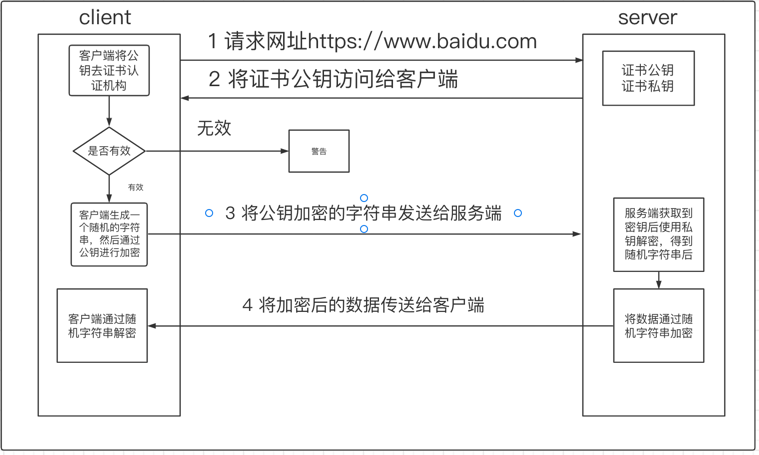
主要步骤如下:
- 客户端请求服务器获取 证书公钥
- 客户端(SSL/TLS)解析证书(无效会弹出警告)
- 生成随机值
- 用 公钥加密 随机值生成密钥
- 客户端将 秘钥 发送给服务器
- 服务端用 私钥 解密 秘钥 得到随机值
- 将信息和随机值混合在一起 进行对称加密
- 将加密的内容发送给客户端
在客户端和服务端进行交互中一共涉及了两种类型的加密算法,一种叫做非对称加密,一种叫做对称加密。
什么是对称加密?
简单说就是有一个密钥,它可以加密一段信息,也可以对加密后的信息进行解密,和我们日常生活中用的钥匙作用差不多。
加密和解密使用同一个字符串, 在上述例子中随机字符串为加密和解密的钥匙, 最常见的 对称加密 算法主要有 DES、3DES、AES。
什么是非对称加密
非对称加密算法,又称为 公开密钥加密算法。它需要两个密钥,一个称为 公开密钥 (public key),即 公钥,另一个称为 私有密钥 (private key),即 私钥。
因为 加密 和 解密 使用的是两个不同的密钥,所以这种算法称为 非对称加密算法。
- 如果使用 公钥 对数据 进行加密,只有用对应的 私钥 才能 进行解密。
- 如果使用 私钥 对数据 进行加密,只有用对应的 公钥 才能 进行解密。
常见的 非对称算法 主要有 RSA、DSA 等
了解了https的工作原理以后, 我们需要在内网使用https该如何使用, 证书又是从哪里来呢?这样我们就需要去了解
openssl。
什么是证书签名请求(csr)
CSR是英文Certificate Signing Request的缩写,即证书签名请求。
CSR文件是申请SSL证书时所需要的一个数据文件,下面将为你详细介绍CSR文件的具体内容。
数字证书的核心,其实就是非对称加密,也就是公私钥对加密。 非对称加密之所以安全,前提条件是用户必须要保障私钥的安全。
因此在用户向CA申请数字证书时,用户首先需要在自己的电脑中先产生一个公私钥对。
用户需要保管好自己的私钥,然后再把公钥和你的个人信息发送给CA机构,
CA机构通过你的公钥和个人信息最终签发出数字证书。
而CSR文件,其实就是包含了用户公钥和个人信息的一个数据文件。
用户产生出这个CSR文件,再把这个CSR文件发送给CA,CA就会根据CSR中的内容来签发出数字证书。
当组织需要签署 SSL 证书时,他们向中间证书颁发机构发送证书签名请求 (CSR)。作为中间证书颁发机构发送的响应
- 由中间 CA 签署的 SSL 证书。
- 由根 CA 签署的中间 CA 证书。
以下命令将为组织生成私钥(.key)以及证书签名请求(.csr)
1 | openssl req -newkey rsa:2048 -nodes -keyout example.com.key -out example.com.csr |
证书签名请求输出两个文件。一个是[organization_domain_name].crt,另一个是intermediate.crt
(如果您的中间 CA 是 GoDaddy,则称为gd-bundle-g2-.crt)
- 计算机可以信任intermediate(中间) CA 的证书,因为它是由root(根) CA 签署的,root(根) CA 最初在制造级别嵌入到 Web 浏览器中。
- 因此,现在可以信任组织的 SSL 证书,因为intermediate(中间) CA 证书是可信任的。 上面的 信任层次称为信任链。
https 工作原理
当浏览器向站点发送 HTTPS 请求时,它会将[organization_domain_name].crt和中间件.crt发送回浏览器。
现在中间件.crt可以被浏览器中列出的根 CA 信任,
而[organization_domain_name].crt可以被浏览器信任该intermediate.crt。
最终,组织的公钥由浏览器提取。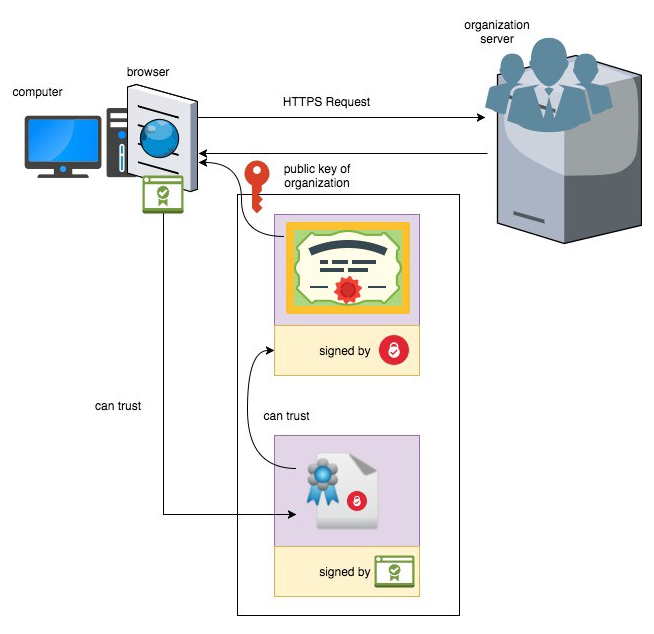
什么是crt文件
crt和密钥文件代表证书的两个部分,key是证书的私钥,crt是签名的证书。
这只是生成证书的一种方法,另一种方法是将它们都包含在一个pem文件中,或者将另一个包含在p12容器中。
CA根证书的生成步骤
生成 RSA 私钥和自签名证书
1 | # Generate CA private key |
系统将提示您输入密码,我建议不要跳过并确保安全。
密码短语将阻止任何获得您的私钥的人, 来生成他们自己的根证书。输出应如下所示:
1 | Generating RSA private key, 2048 bit long modulus |
然后我们生成一个根证书:
系统将提示您输入您的私钥(您刚刚选择的)的密码和一系列问题。这些问题的答案并不那么重要。
他们在查看证书时会出现,而您几乎永远不会这样做。
我建议在其他证书列表中将通用名称设为您可以识别为根证书的名称。这真的是唯一重要的事情。
1 | $ openssl req -x509 -new -nodes -key ca.key -sha256 -days 1825 -out ca.pem |
您现在应该有两个文件:ca.key(私钥)和 ca.pem(根证书)还有一个 ca.csr。
用户证书的生成步骤
服务器端用户证书:
1 | # private key |
使用 CA 证书及CA密钥 对请求签发证书进行签发,生成 x509证书
1 | # generate certificate |
客户端用户证书:
1 | openssl genrsa -des3 -out client.key 1024 |
生成pem格式证书:
有时需要用到pem格式的证书,可以用以下方式合并证书文件(crt)和私钥文件(key)来生成
1 | cat client.crt client.key> client.pem |
安装根证书
将根证书添加到 macOS 钥匙串
1。 打开 macOS 钥匙串应用
2。 转到文件 > 导入项目…
3。 选择您的私钥文件(即 ca.pem)
4。 搜索您回答的任何内容作为上面的通用名称名称

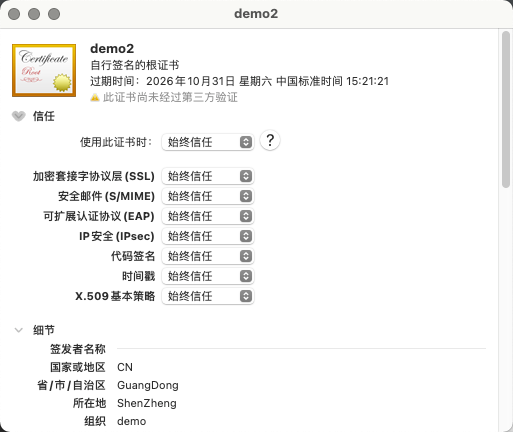
5。 双击列表中的根证书
6。 展开Trust部分
7。 将When using this certificate:选择框更改为“始终信任”
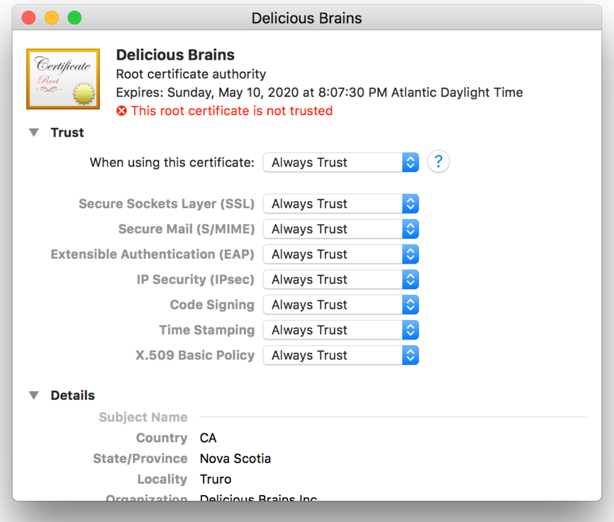
8。 关闭证书窗口
9。 它会要求你输入密码(或扫描你的手指),这样做
如何在自己的私有网站创建https的征书
创建一个新的OpenSSL配置文件, server.csr.cnf以便在创建证书时可以导入这些设置,
而不必在命令行上输入它们。
1 |
|
现在我们是所有设备上的 CA,我们可以为任何需要 HTTPS 的新开发站点签署证书。
首先,我们创建一个私钥:
1 |
|
您将得到与上述相同的所有步骤,而且您的输出证书的内容并不重要。
因为您不会在其他的列表中查看此证书。
接下来,我们将使用 CSR、CA 私钥、CA 证书和配置文件创建证书,但首先我们需要创建该配置文件。
需要配置文件来定义在证书的本节(即扩展名)中定义的主题备用名称(SAN)扩展名:
我们将运行该openssl x509命令来创建证书:
1 |
|
配置文件 (server.ext) 包含以下内容:
1 | subjectKeyIdentifier = hash |
我现在有三个文件: server.key(私钥)、
server.csr(证书签名请求)和 server.crt(签名证书)。
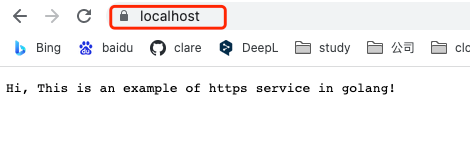
验证
使用golang 验证
1 | import ( |
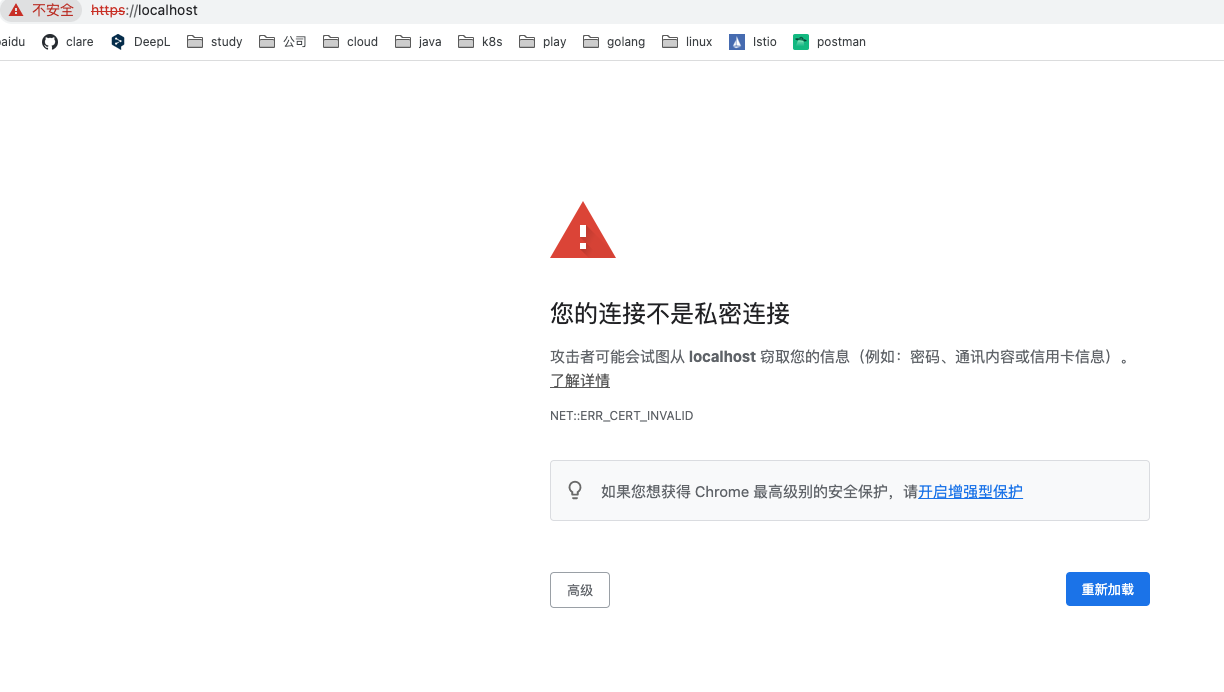
在自己的mac电脑上面导入ca.pem证书,并信任此证书。
再次访问当前的页面, 此时已经成功访问。
引用
浏览器是如何验证HTTPS证书合法性的
https://www.anxinssl.com/9304.htmlHTTPS 的工作原理
https://dahamposithapathiraja.medium.com/how-https-works-5c44fd3f694cOpenSSL Examples to Help You in Real-World
https://geekflare.com/openssl-commands-certificates/